Thai Chili Oil — The Recipe I Figured Out After 6 Months of Testing

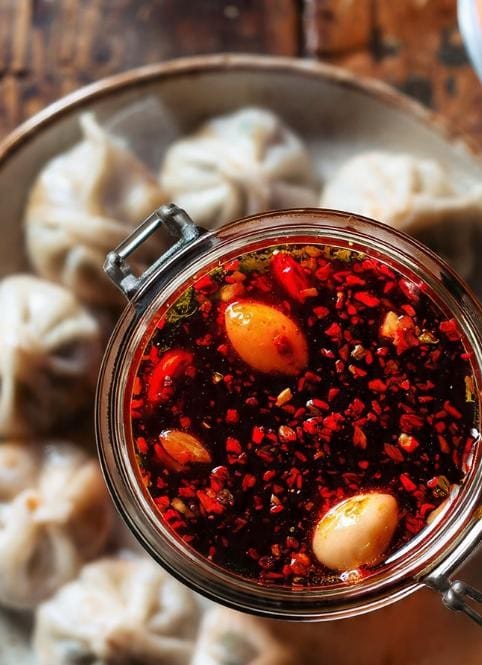
Thai Chili Oil — The Recipe I Figured Out After 6 Months of Testing
Most chili oil recipes on the internet are wrong. They burn the garlic, they use the wrong chili, they throw everything in hot oil at the same temperature and wonder why it's bitter.
This version came from eating at Thai restaurants in Plano, buying chili oil at Asian markets, taking it home, tasting it, trying to make it, failing, adjusting, and doing it again until I had something that matched what I was buying.
Took 6 months. This is what I figured out.
What You Need
- ½ cup dried Thai bird's eye chilies (prik kee noo) — stems removed
- ½ cup neutral oil (peanut or canola)
- 3 cloves garlic, sliced thin
- 1 shallot, sliced thin
- 1 tsp salt
- 1 tsp sugar
The Method
- Toast the chilies first, cold oil. Put dried chilies in a cold pan with the oil. Turn heat to medium-low. This is the step everyone gets wrong — they heat the oil first and dump the chilies in. Cold oil start means the chilies toast evenly before the oil gets hot. If you drop them into hot oil, the outside burns before the inside releases its flavor. Toast 4–5 minutes, stirring gently. The oil will turn a deep, clear red. If it goes brown, the heat is too high.
- Remove the chilies. Fish them out with a slotted spoon and set them aside. They'll crisp up as they cool. If you leave them in, they keep cooking in the hot oil and turn bitter. This is the single most important step and the one every wrong recipe skips.
- Fry the aromatics in the chili oil. Turn heat to medium. Add garlic and shallots. Fry 2–3 minutes until golden — not brown, golden. The garlic should be crisp, the shallots translucent. If the oil was too hot from step 1, the garlic burns in 30 seconds. Keep the heat moderate here.
- Season and combine. Add salt and sugar. Stir until dissolved. Pour the oil with garlic and shallots over the crispy chilies in a heatproof jar. The chilies rehydrate slightly in the warm oil. Seal and let sit 24 hours before using.
The Intelligence
Why cold oil start: Dried chilies have oil-containing cells that need gentle heat to release their compounds without charring the cell walls. Hot oil instantaneously chars the exterior, creating bitter compounds before the interior flavor compounds have time to diffuse into the oil. Cold-to-medium oil extraction gives you a clean, bright chili flavor instead of burnt bitterness.
Why remove the chilies: Dried chilies continue cooking in hot oil even after removed from heat. The residual heat in the oil (350°F+) continues to break down the chili compounds — first the bright flavors, then the heat compounds, then the sugars, eventually reaching bitter compounds. Removing them at peak color locks in the bright flavor and prevents the bitter compounds from forming.
Weeknight version (10 minutes): Use fresh bird's eye chilies instead of dried. Slice thin, fry in oil for 2 minutes, add garlic and shallots for 1 more minute. The fresh chili version is brighter and less complex than the dried version, but it's passable in a hurry. Use the cold oil start here too — fresh chilies burn even faster than dried.
Creative twist — the fish sauce upgrade: Add 1 tablespoon of fish sauce to the oil at step 3 with the garlic and shallots. The fish sauce caramelizes in the hot oil and adds a deep, savory undertone that plain chili oil doesn't have. It doesn't make the oil taste fishy — it adds umami depth that makes every dish you put it on taste richer. This is the version I use most often now. I can't go back.
Original recipe, tested and refined over 6 months of cooking and tasting. The cold oil start is not negotiable.